Table of Contents
Overview
CQ Federal's Bill Status Report helps you compile updates, actions and notes around key pieces of legislation your team or organization is tracking, all with a few clicks of a button. Bill Status Reports are easy to generate, customize and share - all steps required are outlined in this article.
Creating a Bill Status Report
To get to bill status reports, simply navigate to ‘Create’ on the main toolbar, and down to ‘Report.’ Once you’ve clicked ‘Report,’ select ‘Bill Status’ as the report you would like to build and click ‘Choose.’
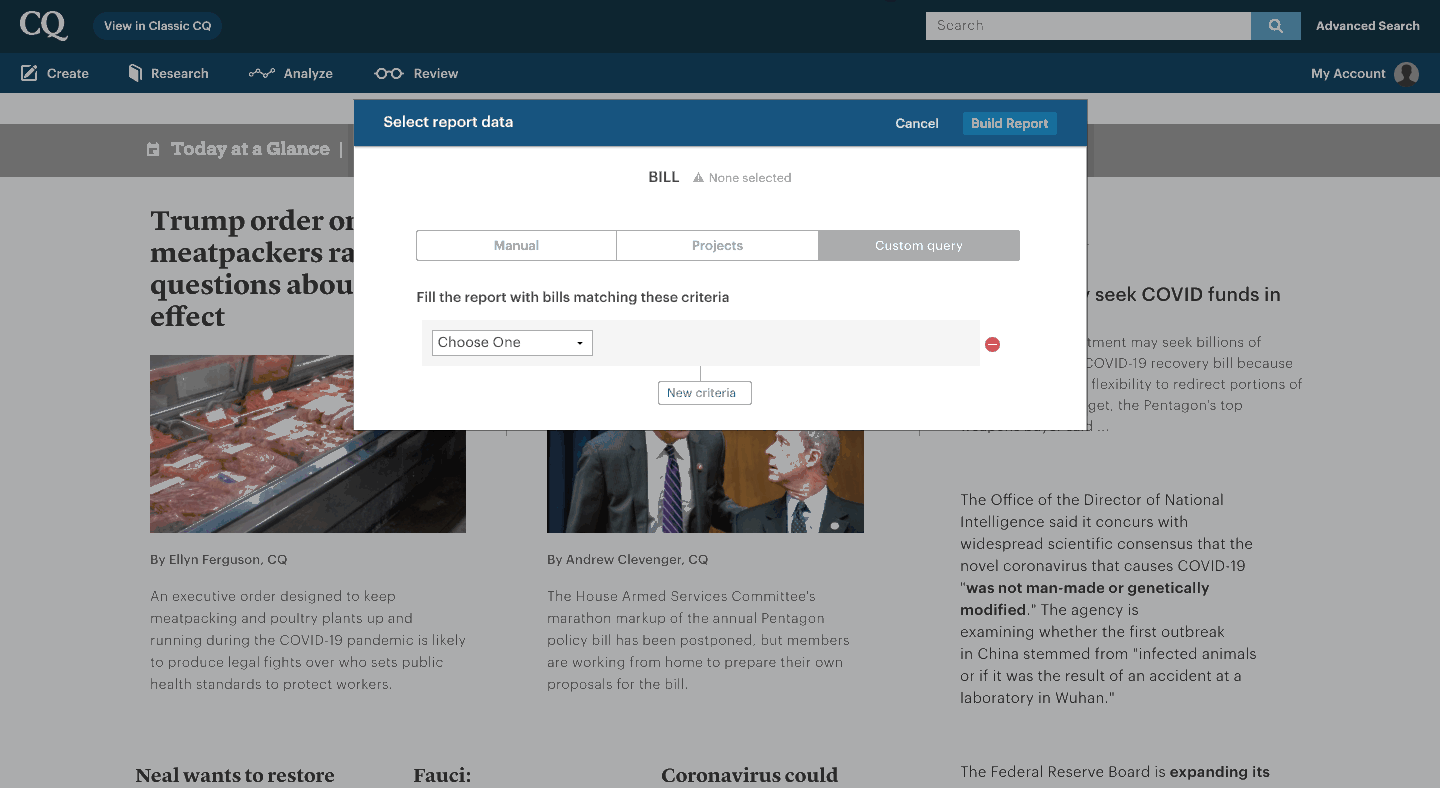
Now, it’s time to pick the bills you’d like to select for your report. There are three options:
1. Manual: If you have specific bills in mind that you would like to include, simply type in the bill title (for example, “CARES” for the CARES act) or the bill number (for example, HR6405). Once the bill you’d like to include pops up in the search bar, click it, and it will be added to your report.
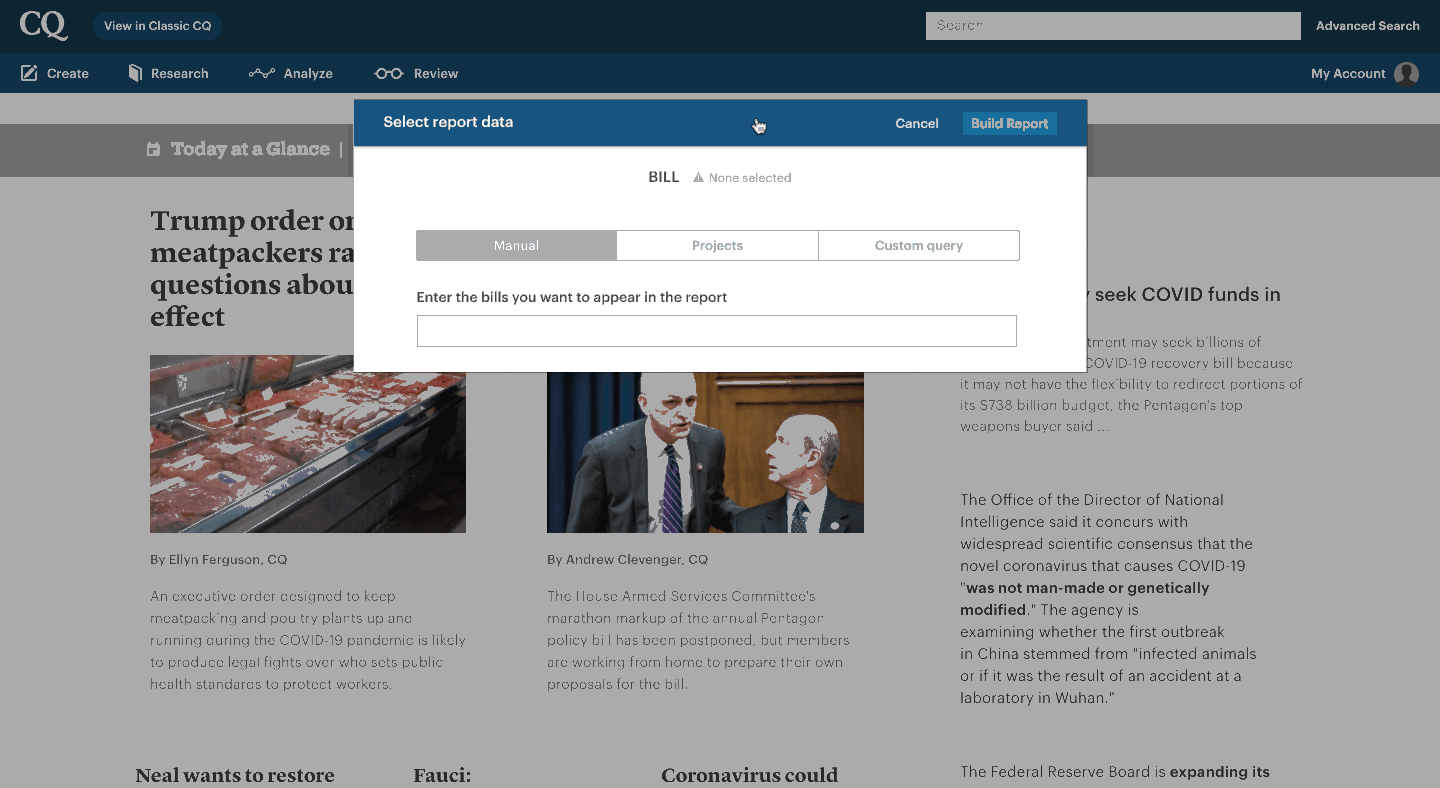
2. Project: If you or your team has compiled a number of bills and added them to a project, simply select the project folder that contains the bills you’d like to include.

3. Custom Query: If you aren’t sure exactly which bills you need, or if you’d like to pull a large group of bills, ‘Custom Query’ might be the option for you. Choose from the dropdown of options to select your criteria. Bear in mind that you can nest, or layer, as many criteria as you’d like.
Once you’ve chosen the bills you’d like to include, click ‘build report’ in the upper righthand corner.
Customizing Your Bill Status Report
Now that you have your report built, it’s time to make any custom alterations you might need.
First thing’s first - always remember to add a title to your report by clicking the box that says ‘Bill Status Report.’
Adding Columns
All of the default columns you see on your report can be removed, and other columns can be added. To do so, simply click ‘Change layout and fields’ in the upper righthand corner.
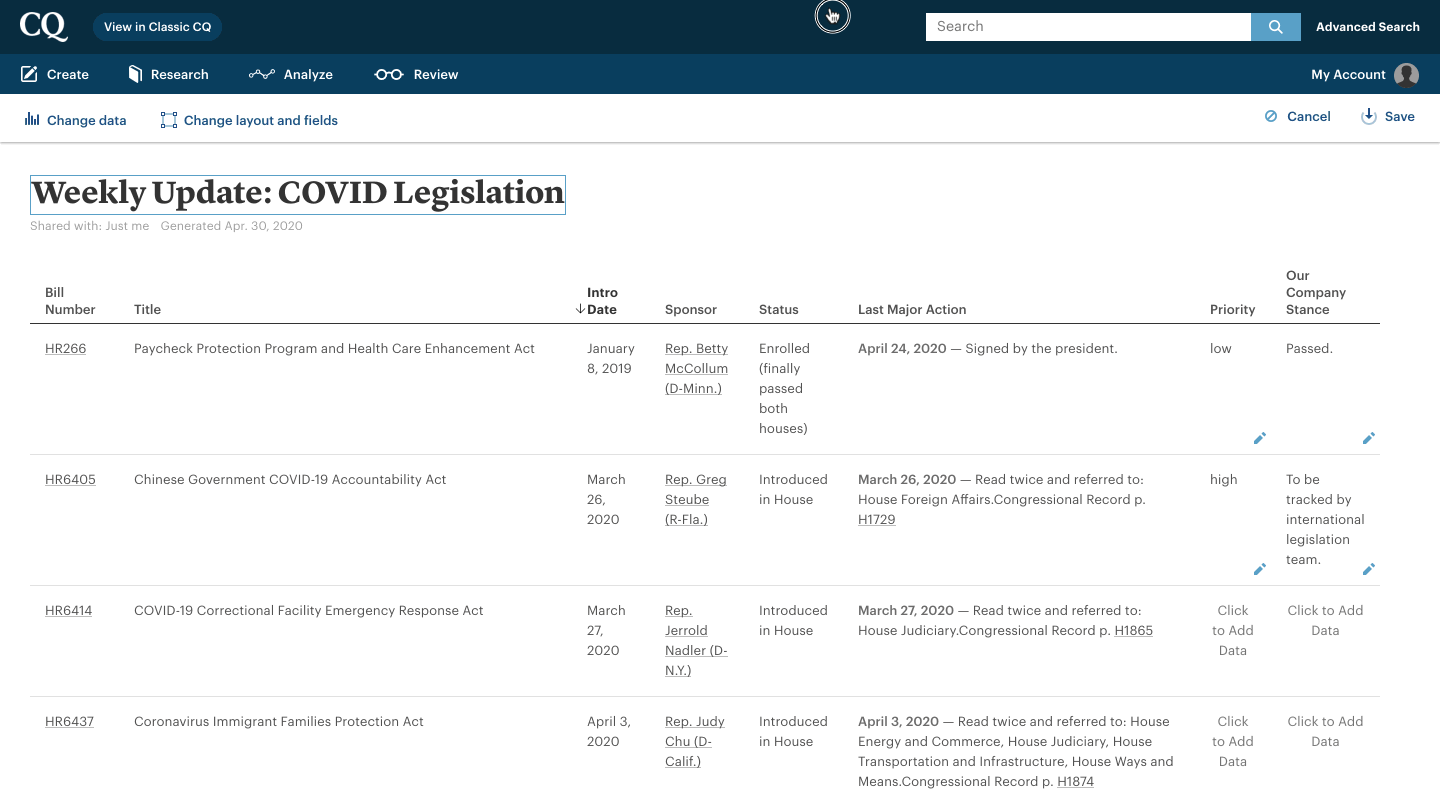
Once you arrive to this screen, you can choose to delete any current columns by simply clicking the red circle above the column box.
To add columns, click ‘Add column’ in the upper righthand corner. Now, you can choose to add either a default CQ column, such as Committee, floor vote, title, and so on, or you can add in your own custom fields.
Once you’ve selected the columns you’d like to add, hit ‘Save.”
Creating Custom Fields
If you'd like to add a column to your report that isn't listed in the default fields, you should create a custom field.
To do so, click ‘My Account’ and then ‘Account settings.’ Once you arrive at this page, click ‘Custom fields’ on the lefthand side, then ‘new custom field’ near the top of the page.
There are a few types of custom fields you can create:
- List of Account Users: This will create an option for you to choose from the users in your CQ Federal account for the purpose of assigning tasks, for example.
- Number: The column will display the bill number (i.e., HR1), for the associated bill(s) in the report.
- Date: This will create a field where you can select a date via calendar view for tracking or accountability purposes.
- Text: This will create an empty text box, where you can put any notes you like.
Multiple Choice: Use this option to create a dropdown list of items to choose from.
You can name the custom field anything you’d like, like ‘Notes’ for a text custom field, for example. Once you’re done, hit save.
Now, when you head back to your report, you can add these custom fields via the process outlined above.
Examples
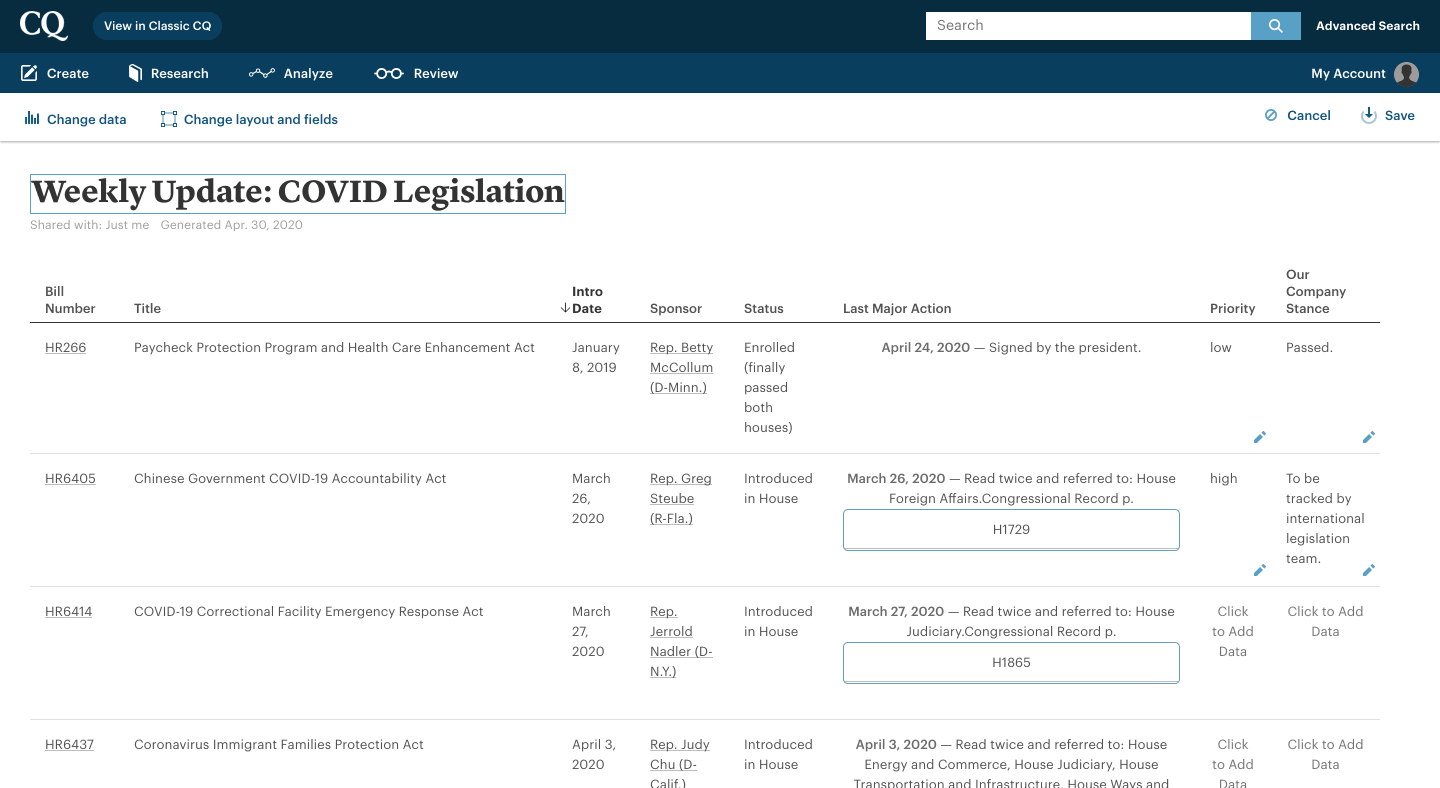
Weekly or Monthly Legislative Update
Use the Bill Status Report to create and share a weekly, monthly or quarterly update on key legislation your team or organization care about.
Make use of custom fields to add in bill priority; notes for the team; assign tasks to specific team members, and more.
Export as a PDF to send via email or whatever mode of communication you prefer!
FAQ
Q: Will my Bill Status Report PDF automatically update?
A: No - you have to re-run your report and export a new copy to see updates.
Comments
Please sign in to leave a comment.